
Jelly Roll Rail Fence {a finished quilt and tutorial!}
If you are anything like me, you've probably purchased a jelly roll or two of a fabric line that you fell in love with and simply "had to have". Then, those pretty little jelly rolls sit on your shelf or in the closet of your sewing room for years because you just don't know what to make with them. A lot of jelly roll patterns I've seen don't utilize all of the strips, or you need a lot of background or other fabric to complete the quilt top.
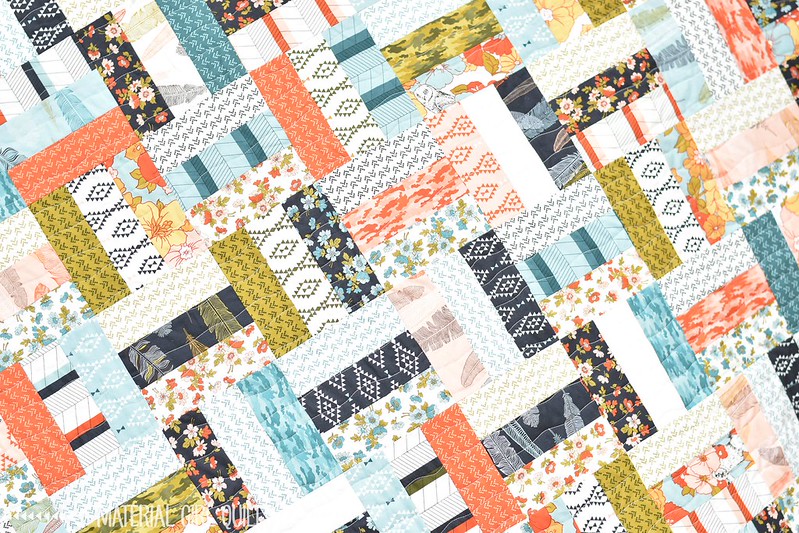
Well, I pulled out two jelly rolls that I've had hoarded since 2014 of Urban Chiks Nomad line for Moda Fabrics and decided to make a quilt using only the jelly rolls for the quilt top. A perfect design that can be made using only strips is a Rail Fence quilt.
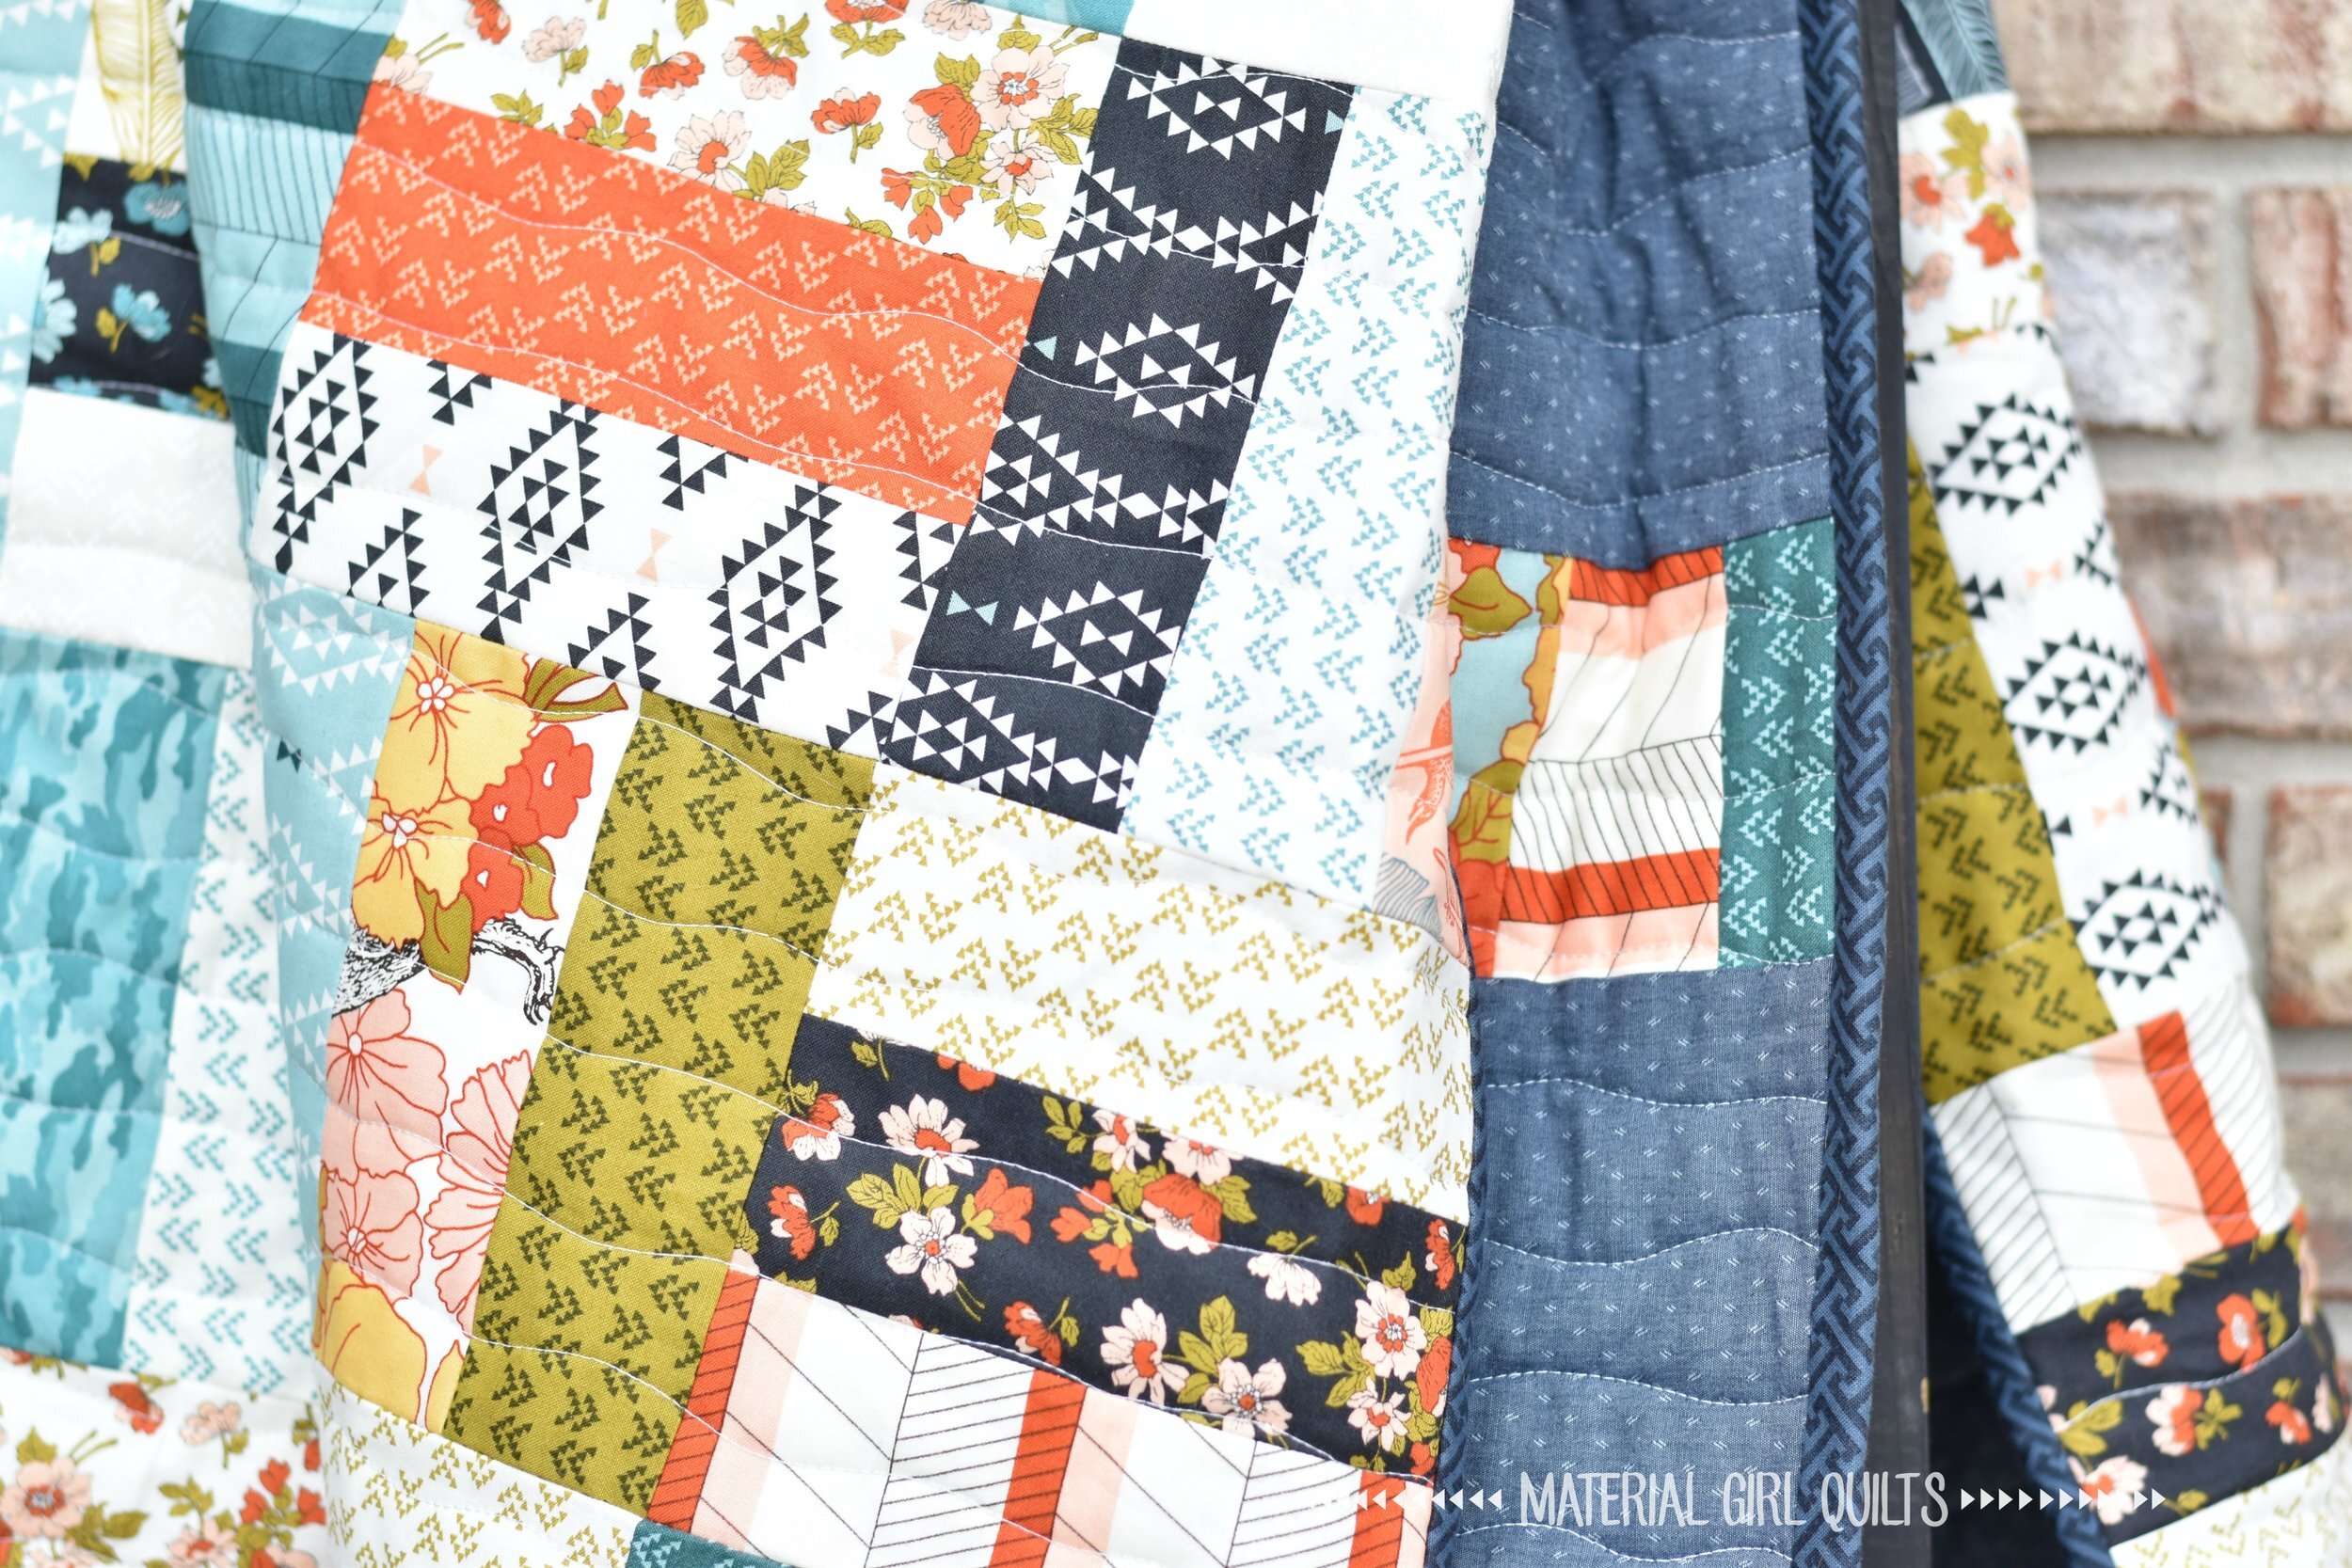
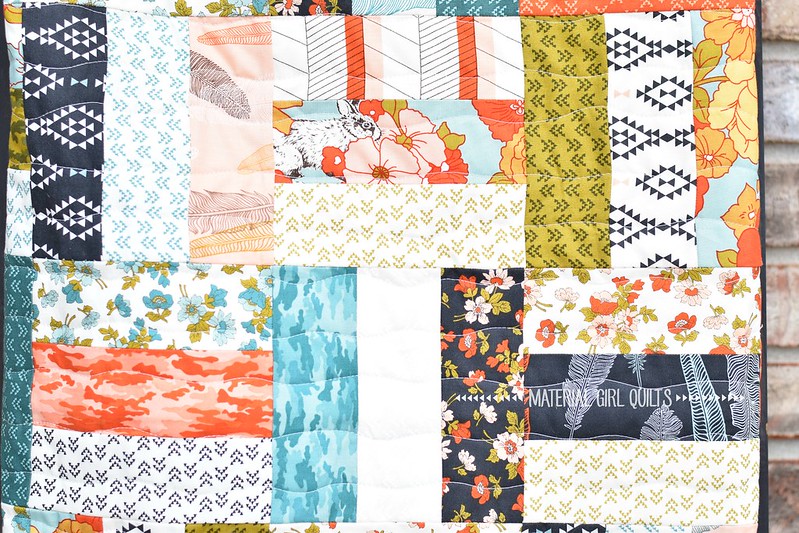
A Rail Fence quilt is typically made up of blocks that contain three equal sized rectangles. When using jelly rolls, the width of the strips is 2 1/2", so piecing three strips together results in a block that is 6 1/2" wide (unfinished). The Rail Fence pattern then comes to life by alternating the direction of the blocks when you put them all together into the quilt top.
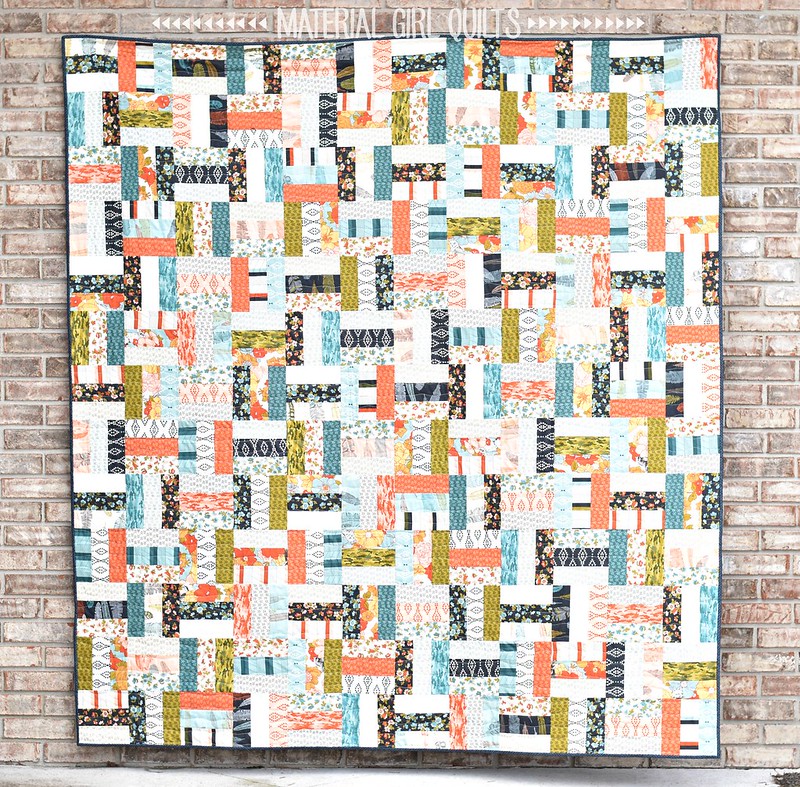
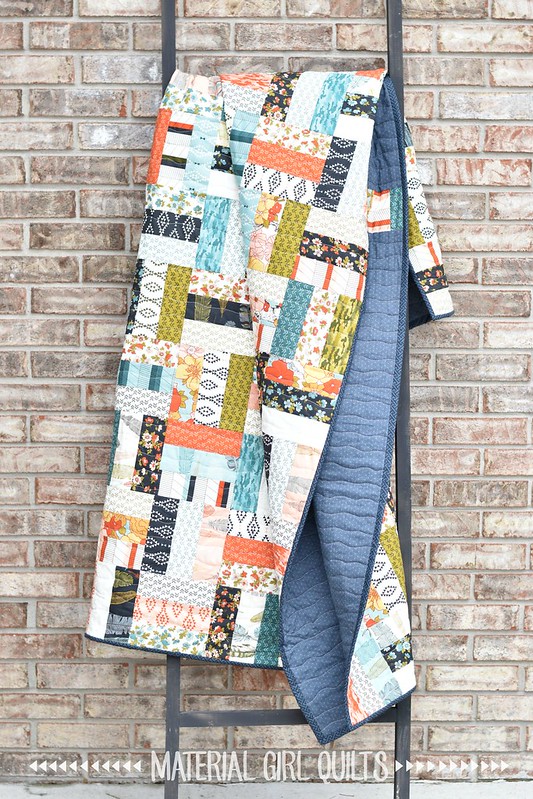
This quilt is pretty large since it uses two jelly rolls (78 total strips) and finishes at 72" x 78". You could still create a Rail Fence quilt using only one jelly roll, it would just be smaller. If you use 36 total strips, you would end up with a quilt that finishes at 48" x 54".
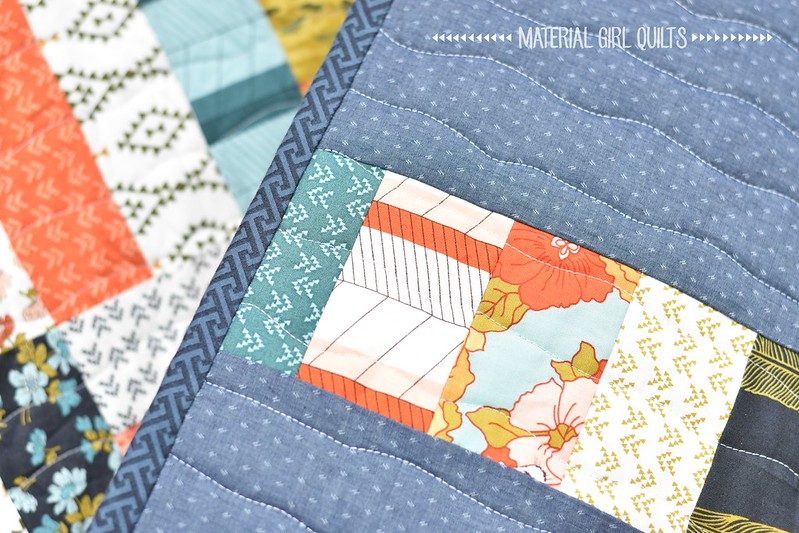
I had some other quilt deadlines that I had to meet, so in an effort to get this one quickly finished, I quilted it with simple wavy lines. I already know that I'm going to love the texture once it's been washed, dried and is all crinkly!
For the backing I didn't like anything that I had in my stash, so I stopped by my local quilt shop (Crimson Tate) and found this Robert Kaufman "Quotes" Chambray in Navy. Trust me when I say that it is luxuriously soft and it's also a great light weight which helps keep this large quilt from being too heavy. I pieced it together with some leftover strip sections to create a fun little stripe on the back.
If you'd like to create a Jelly Roll Rail Fence quilt, everything you need to know is below.
Fabric Requirements for 72" x 78" quilt:
- 2 jelly rolls (or 78 - 2 1/2" x WOF strips)
- 4 1/2 yards backing fabric
- 3/4 yard binding fabric
Block Assembly:
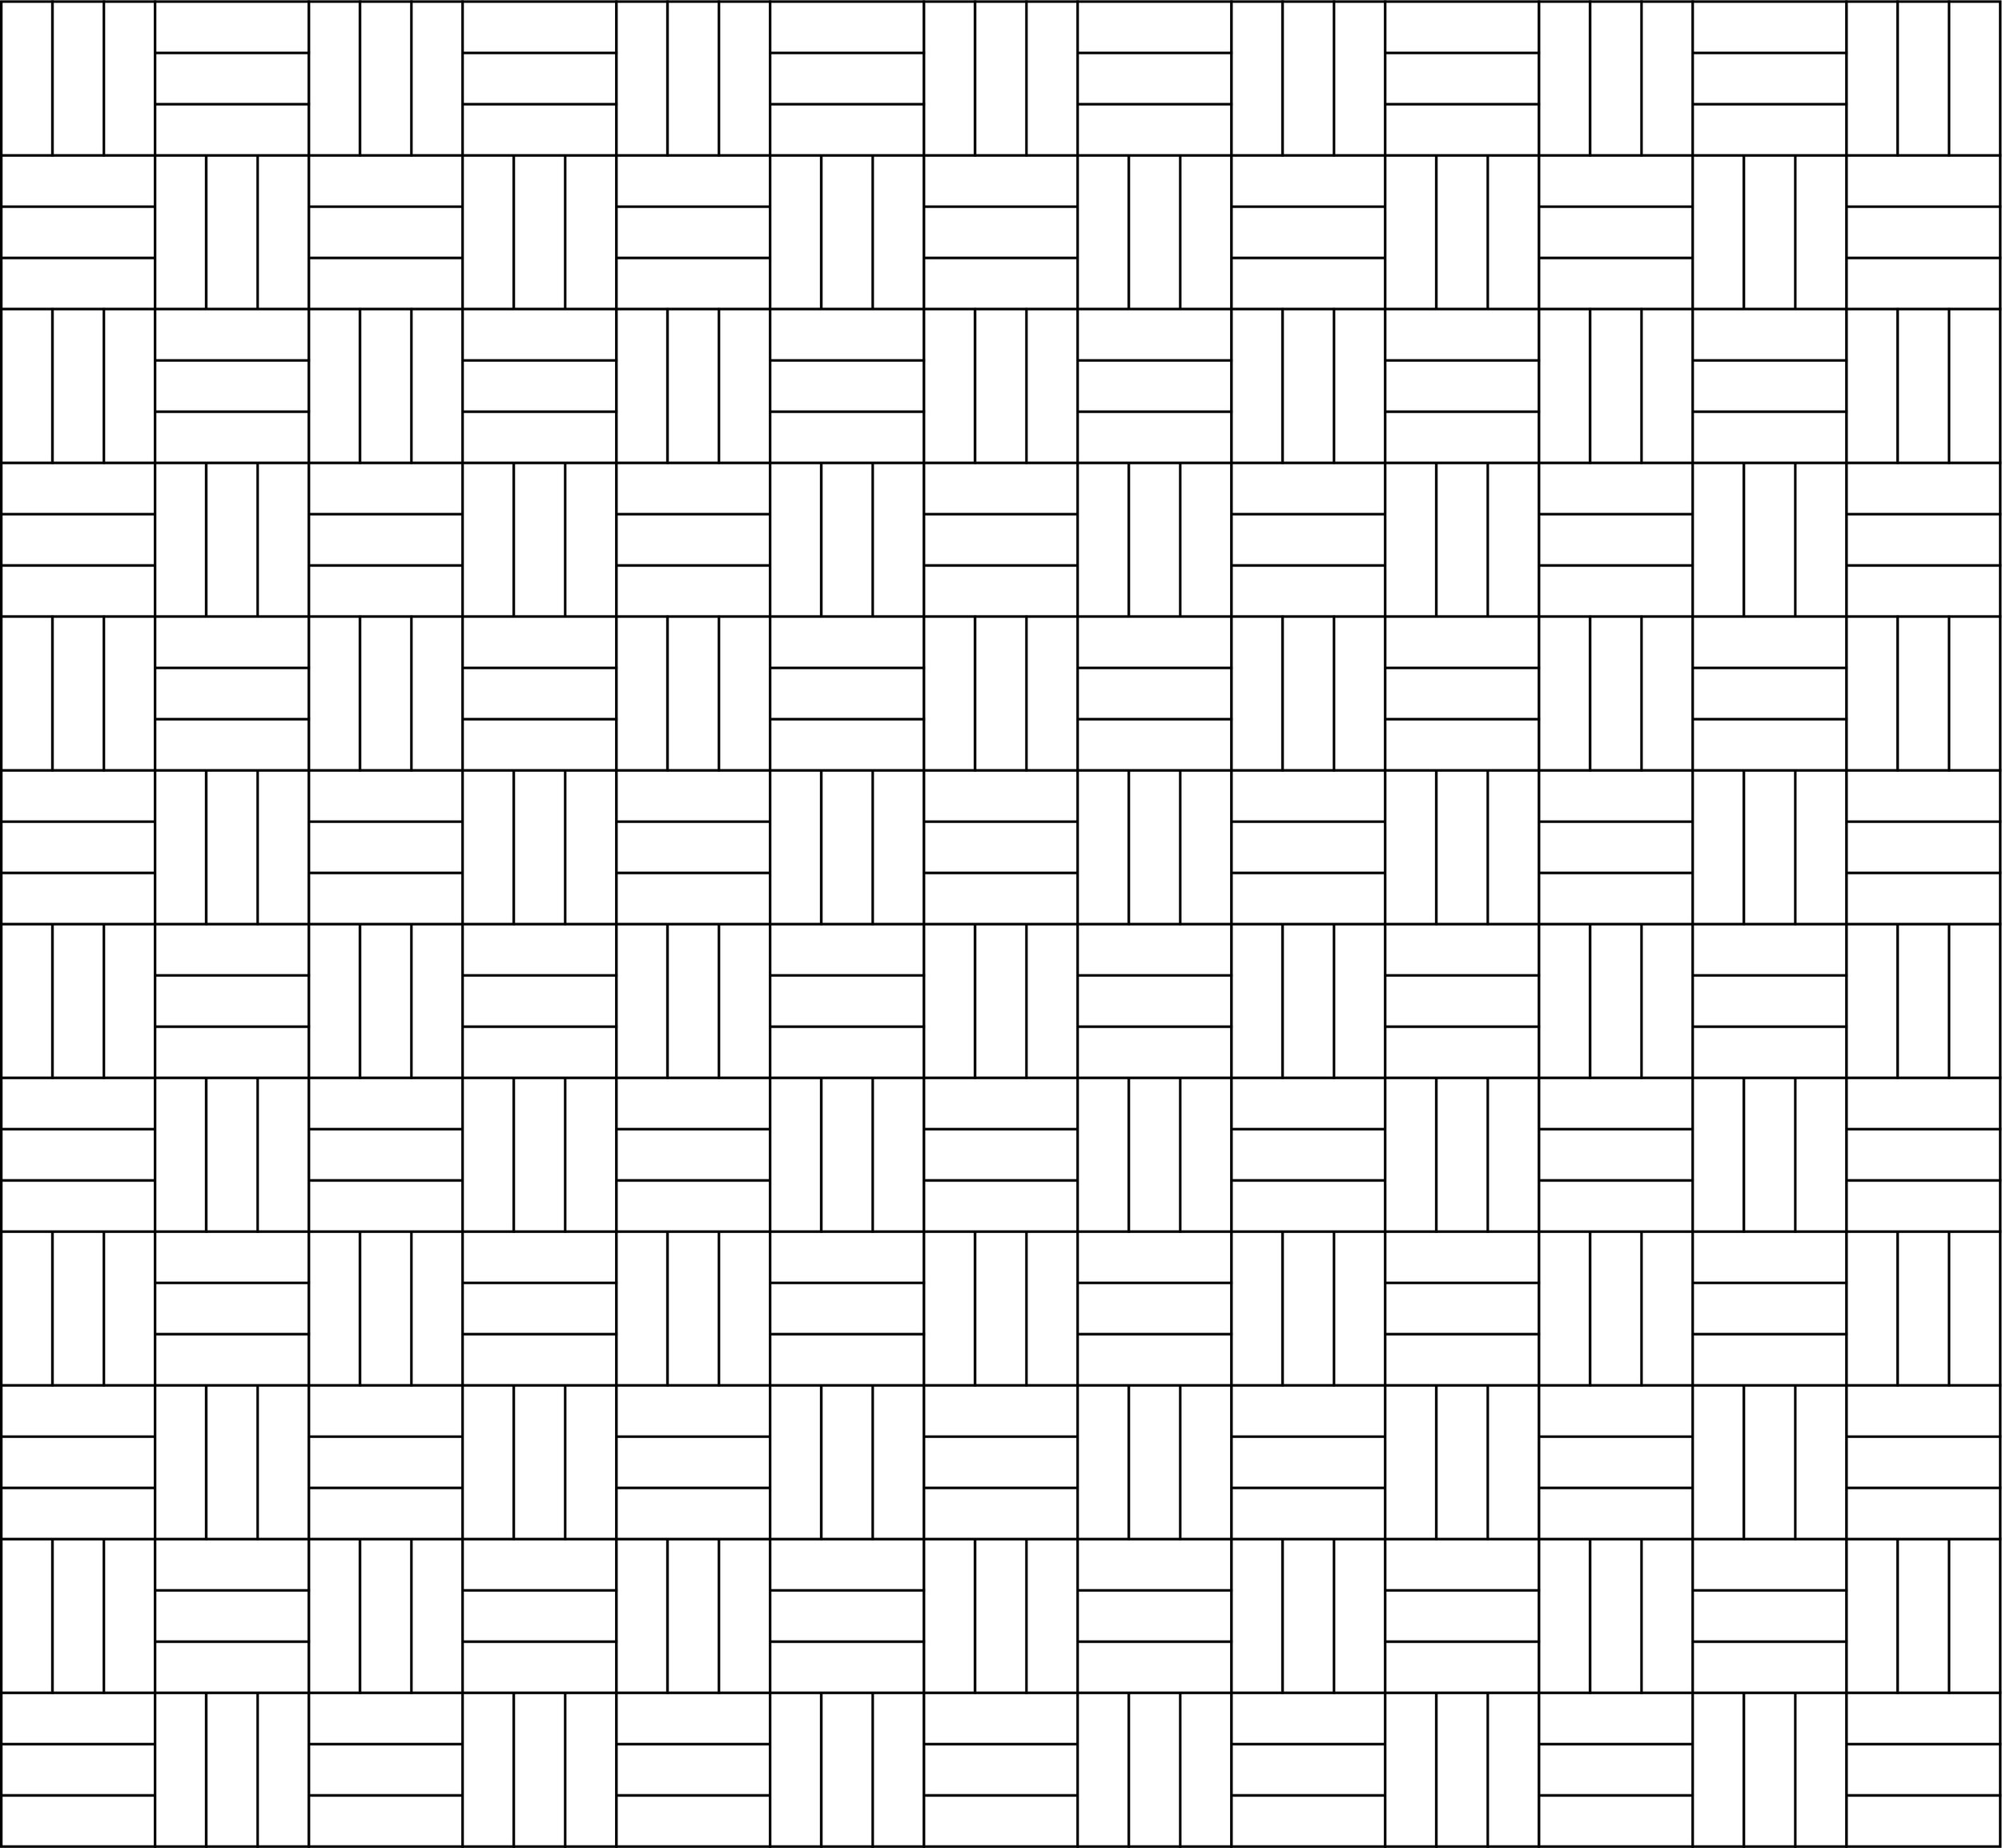
- Select three jelly roll strips and sew together to create one 6 1/2" x 42" rectangle. Press the seams open.
- Using your rotary cutter, trim off one selvage end to square up your pieced rectangle and then cut into 6 1/2" segments as shown. You will create a total of six 6 1/2" blocks from each pieced rectangle.

- Repeat to create a total of 156 - 6 1/2" square blocks.
Quilt Top Assembly:
- Lay out your 156 blocks into 12 rows of 13 blocks each (alternate the direction of the blocks as shown - vertical, horizontal, vertical, horizontal, etc.).
- Sew each row together and press your seams toward the vertical blocks.
- Piece the sewn rows together in sections. I usually sew rows together as pairs and then start sewing the pairs together. So I will start with six pairs of rows sewn together. Then I will sew together paired rows to create three sets of four rows sewn together. Then piece together the three sets of rows to complete the quilt top. In a larger quilt, it is easier to manage the rows as smaller sections than to just keep adding rows onto one pieced section.
Fabric Requirements for 48" x 54" quilt:
- 1 jelly roll (or 36 - 2 1/2" x WOF strips)
- 3 yards backing fabric
- 1/2 yard binding fabric
Using the same block assembly instructions as above, create a total of 72 - 6 1/2" blocks. Lay the blocks out into 8 rows of 9 blocks each (see below) and assemble as instructed above.

Now, go raid your stash of jelly rolls that you've been hoarding for years and turn them into a beautiful quilt! I promise, you won't regret it ;-)
Amanda