
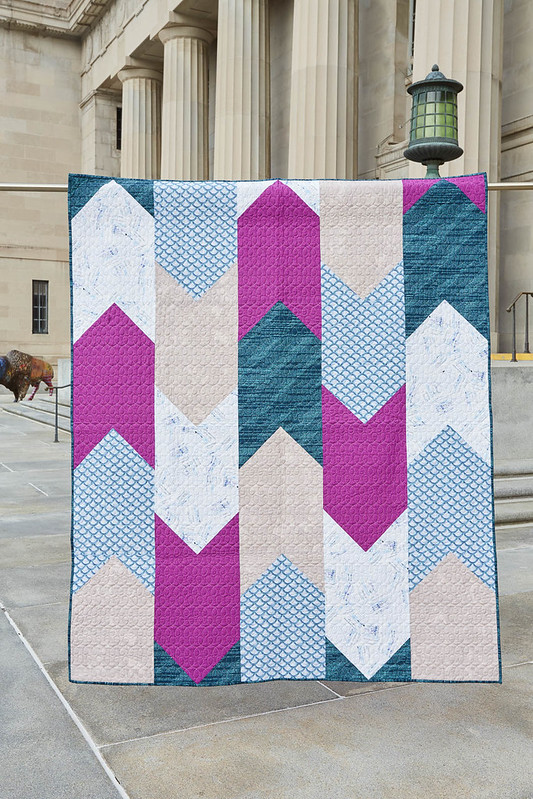
Bookmark {a finished quilt and tutorial!}
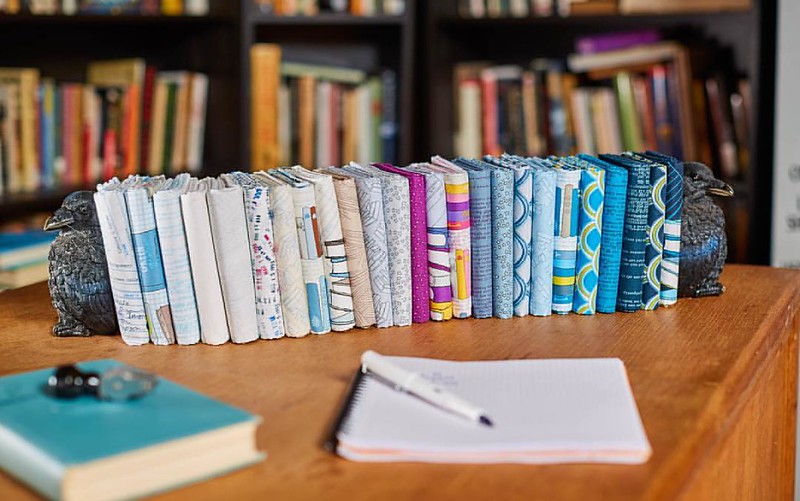
Last fall I was lucky enough to help Heather Givans by designing a quilt for her latest fabric line called Literary for Windham Fabrics. If you are a reader and lover of books, you will LOVE this fabric line! The colors are right up my alley and the prints are perfect including some text from Anne of Green Gables, library cards, book covers, white on white book pages, stacks of books and tiny stars. The photo from Heather below shows all of the prints lined up. It's such a great collection. This fabric is now arriving in your local quilt shops and of course Heather has it all at Crimson Tate available for purchase.
My quilt design is called Bookmark, and by looking at the photos, you can probably guess why I chose that name :) The photos below were all taken by the talented Eric Lubrick. He sure makes our quilts look good!
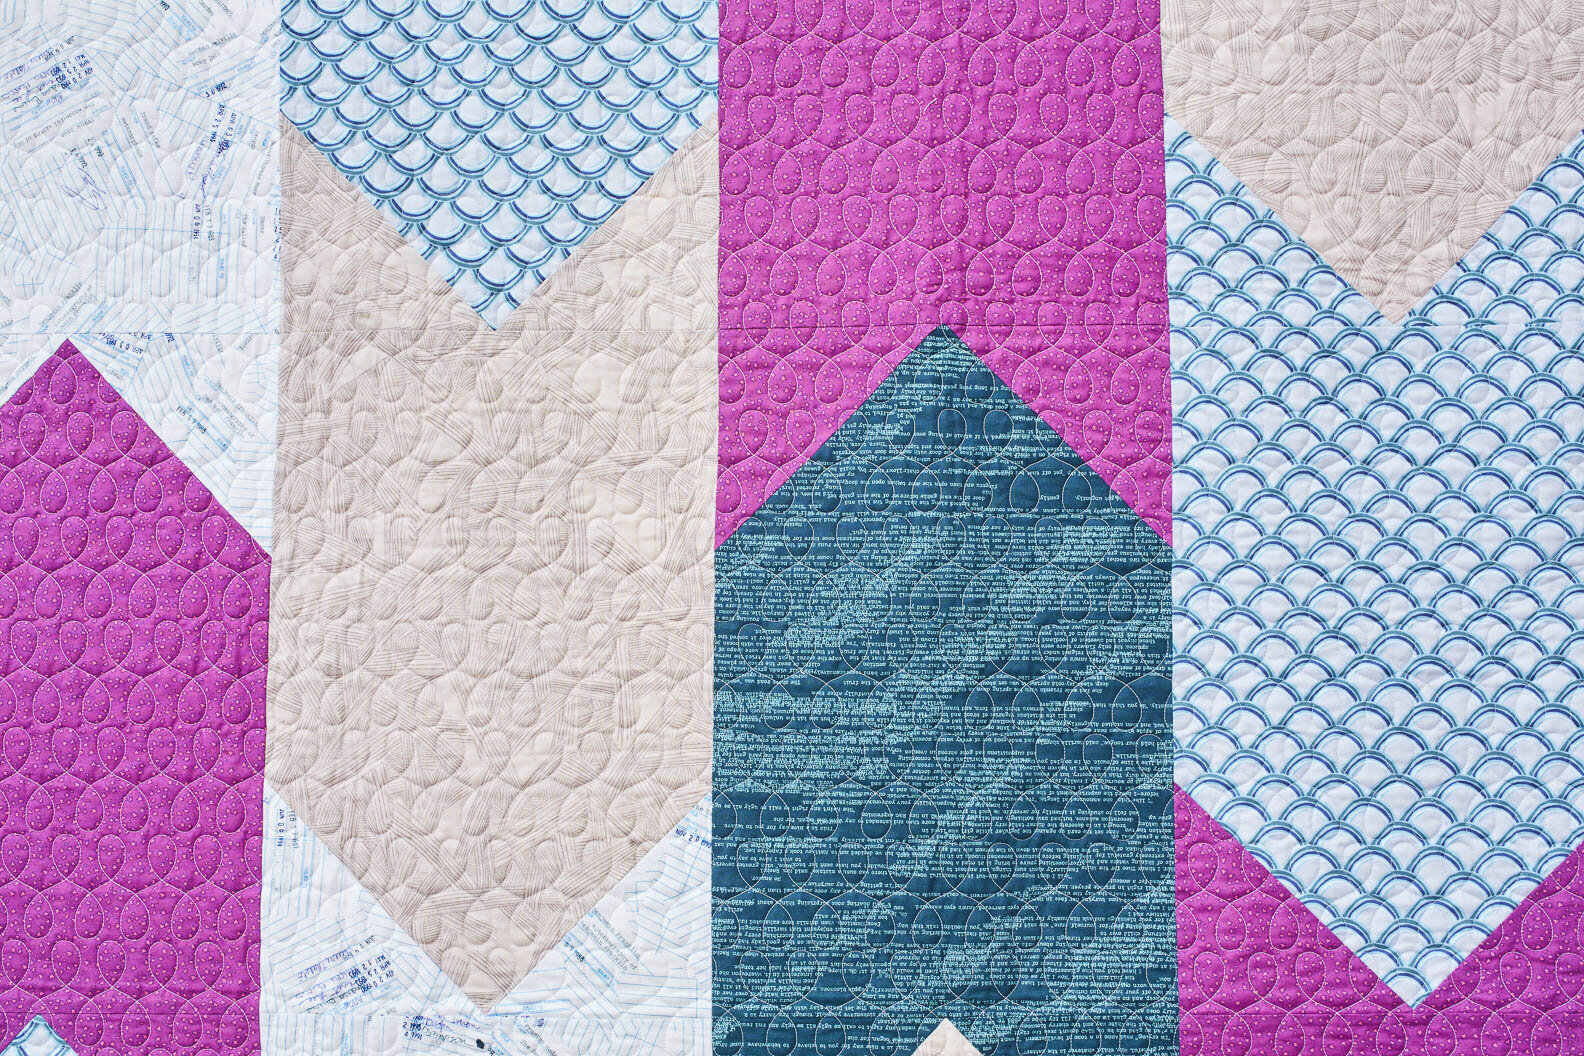
Heather sent the quilt to Dan Clayton for quilting and I love the texture of this design.

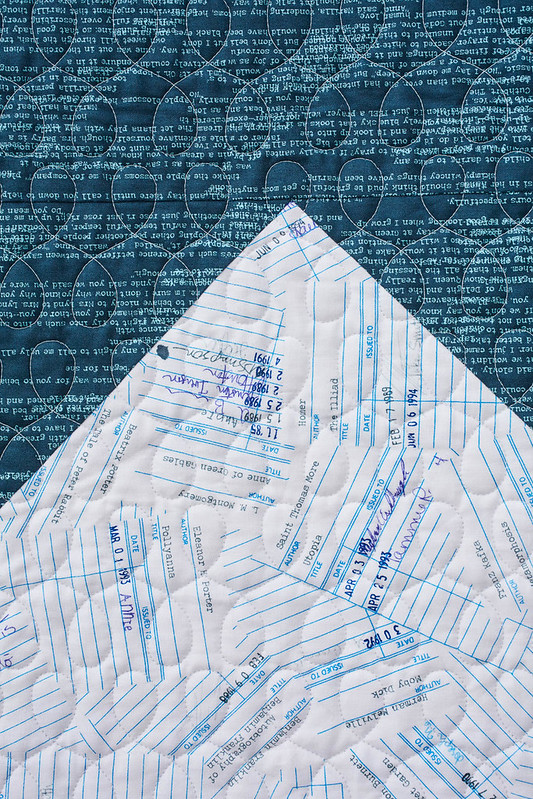
Two of my favorite prints are shown in the photo below. I love the dark blue shade on the text print and those library cards bring back a lot of great memories!!
To make your own Bookmark quilt you will need the following:
Fabric A (beige) - 1 1/4 yards Fabric B (gray) - 1 1/2 yards Fabric C (white) - 1 1/4 yards Fabric D (navy) - 1 1/2 yards (include binding) Fabric E (magenta) - 1 1/4 yards
CUTTING INSTRUCTIONS:
Fabric A:
- cut two 18 1/2" x WOF strips and subcut into five 12 1/2" x 18 1/2" rectangles
- cut four 6 1/2" squares
Fabric B:
- cut two 18 1/2" x WOF strips and subcut into five 12 1/2" x 18 1/2" rectangles
- cut one 6 1/2" x WOF strip and subcut into six 6 1/2" squares
Fabric C:
- cut two 12 1/2" x WOF strips and subcut into four 12 1/2" x 18 1/2" rectangles
- cut two 6 1/2" x WOF strips and subcut into ten 6 1/2" squares
Fabric D:
- cut one 12 1/2" x WOF strip and subcut into two 12 1/2" x 18 1/2" rectangles
- cut two 6 1/2" x WOF strips and subcut into ten 6 1/2" squares
- cut seven 2 1/2" x WOF strips for binding
Fabric E:
- cut two 12 1/2" x WOF strips and subcut into four 12 1/2" x 18 1/2" rectangles
- cut two 6 1/2" x WOF strips and subcut into ten 6 1/2" squares
Block Assembly:
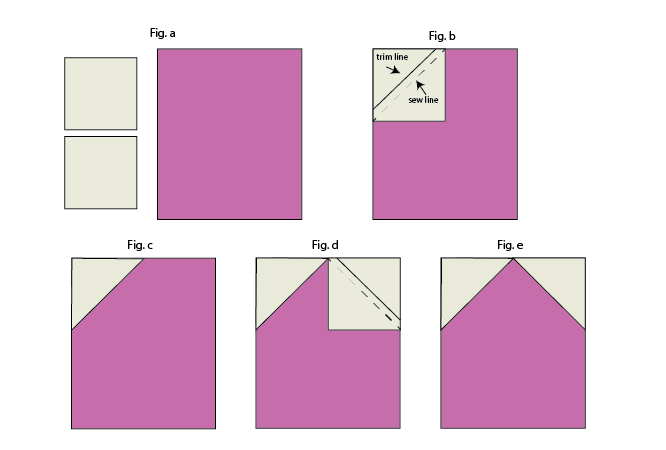
- Select one Fabric A rectangle and two Fabric B squares (Fig. a).
- Place one square right sides together on the top left corner of the rectangle (Fig. b) and draw a diagonal line across the back of the square fabric as shown. Stitch directly on your drawn line and then trim 1/4" past the stitched line to remove the excess fabric.
- Press your seams toward Fabric B (Fig. c).
- Place the second square on the top right corner of the rectangle (Fig. d) and draw a diagonal line across the back of the square fabric. Again, stitch directly on the drawn line and then trim 1/4" past the stitched line to remove the excess fabric.
- Press your seam toward Fabric B (Fig. e). This block creates the arrowhead portion of your bookmark :)
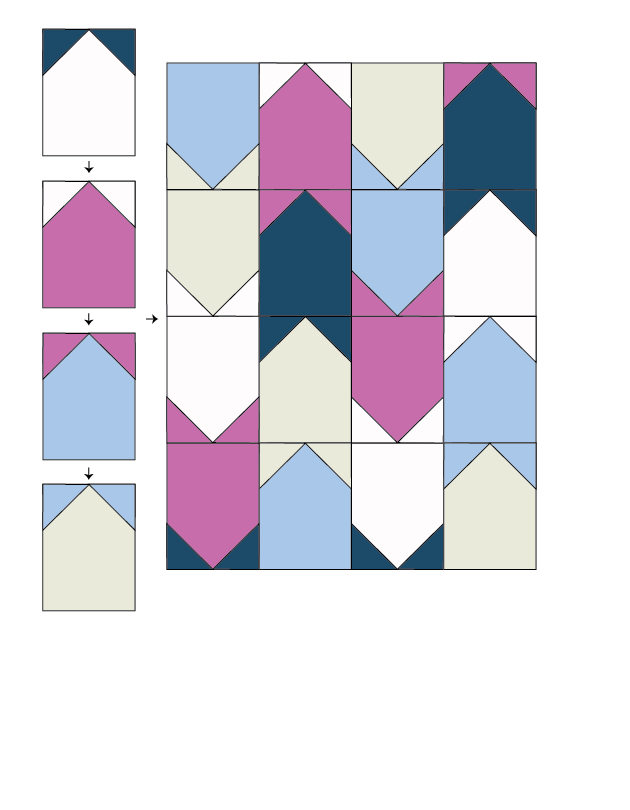
Continue making the blocks using the fabric combinations listed below.
- Fabric A rectangle - Fabric B squares (3 total)
- Fabric A rectangle - Fabric C squares (1 total)
- Fabric A rectangle - Fabric D squares (1 total)
- Fabric B rectangle - Fabric A squares (2 total)
- Fabric B rectangle - Fabric C squares (1 total)
- Fabric B rectangle - Fabric E squares (2 total)
- Fabric C rectangle - Fabric D squares (3 total)
- Fabric C rectangle - Fabric E squares (1 total)
- Fabric D rectangle - Fabric E squares (2 total)
- Fabric E rectangle - Fabric C squares (3 total)
- Fabric E rectangle - Fabric D squares (1 total)
Quilt top assembly:
Once all of your blocks are complete, lay them out according to the quilt layout diagram below. Sew your blocks into "columns" pressing toward the rectangles and away from the point on the arrowhead. Sew your "columns" together pressing your seams open.
Bookmark finishes at my favorite throw size - 60" x 72". I think this design would also look great showcasing your favorite large print fabrics (you know...those that break our hearts to cut up!). Regardless of what fabric you choose, I can promise you that this will likely be the quickest quilt top finish you've made. I was done in an afternoon (cutting and piecing included).
Amanda