
Business Card Holder {Tutorial}
Okay, so I have what I think are some pretty awesome business cards for Material Girl Quilts. The only problem is that I needed a cute business card holder for my purse. I didn't want to use the boring vinyl/plastic free one that came with the cards, so I decided to make one for myself.

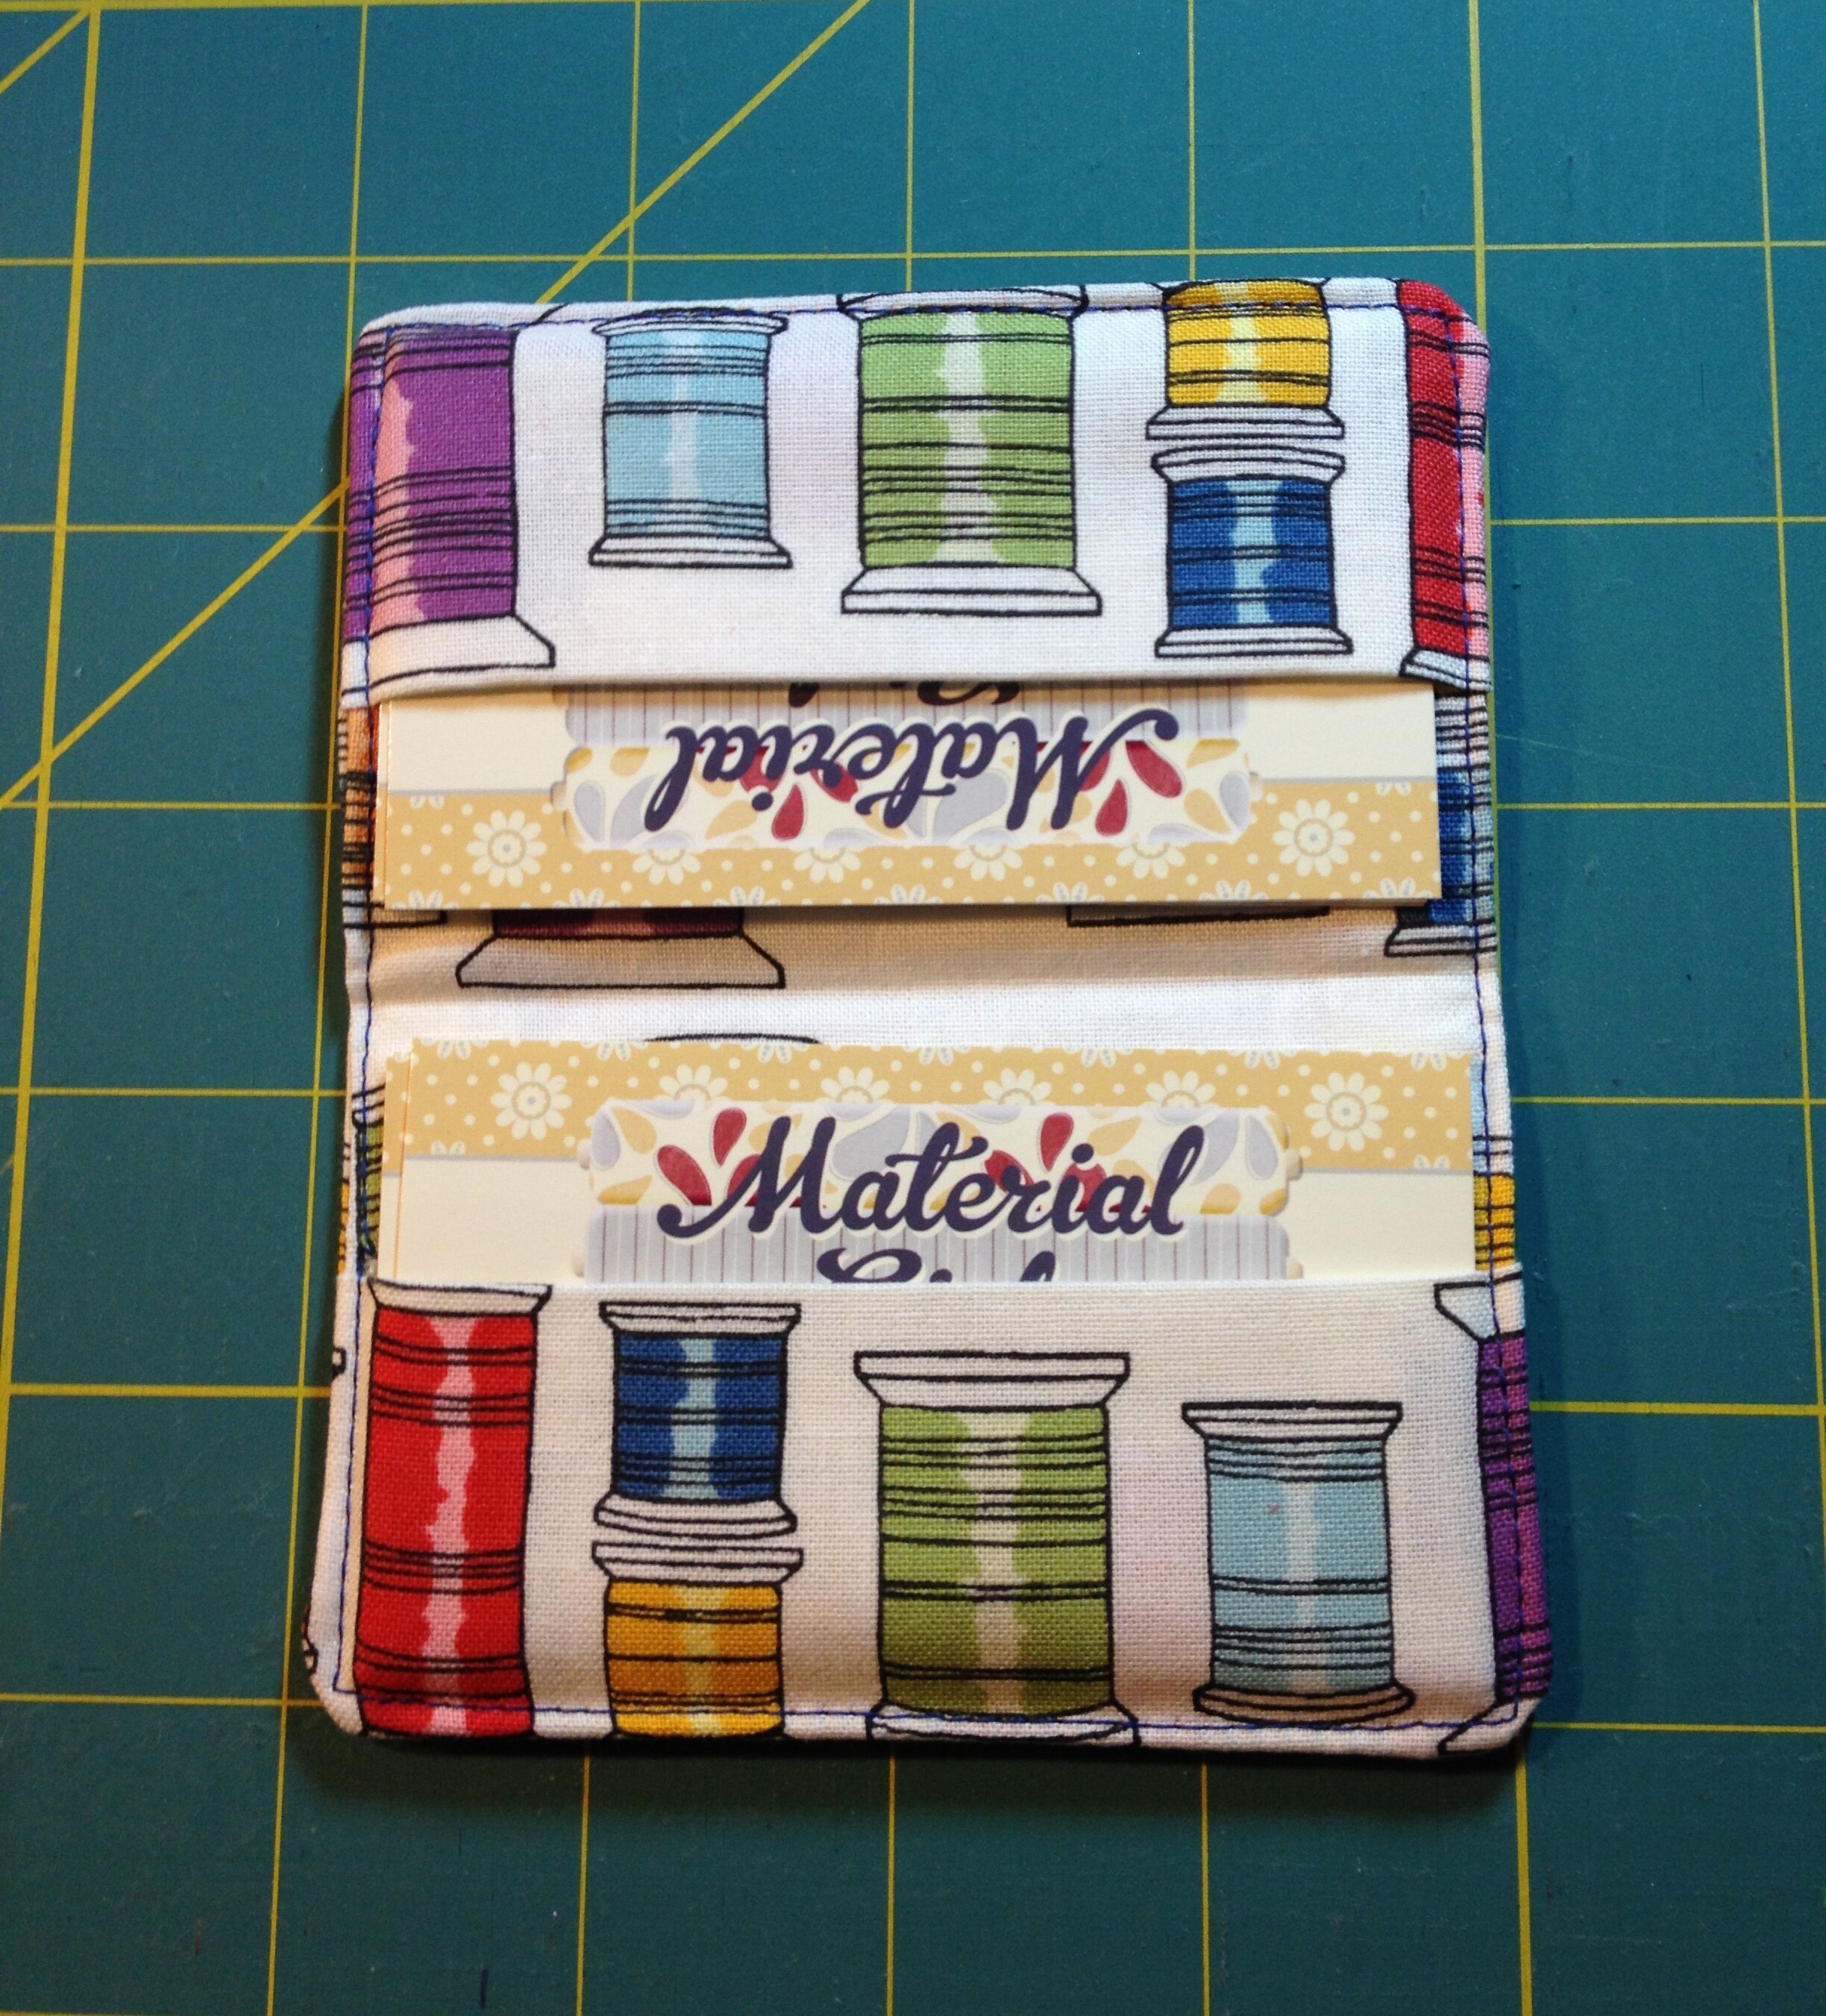
What do you think? I LOVE the "Nice Threads" fabric from Alexander Henry and I had a fat quarter that was waiting for just the right project. I'm pretty sure it was meant for this purpose ;-)
I thought I would share how I made this quick/easy business card holder with the rest of you. So, here goes...
Materials Needed:
- You can use scraps or you will need what amounts to about a fat eighth of fabric.
- 4 3/4" x 5 3/4" piece of fusible interfacing
- coordinating thread

1. Cut your fabric into 2 (two) pieces measuring 5" x 6" and 2 (two) pieces measuring 4" x 5"

2. Trim your interfacing just a bit smaller than the large fabric pieces to be 4 3/4" x 5 3/4"
3. Using the manufacturers instructions on the fusible interfacing, fuse it to the wrong side of one of the 5" x 6" pieces (this piece will end up being the outside of the card holder).
4. Now fold the 4" x 5" pieces in half so that they measure 2" x 5" each and press on the fold.

5. Layer the remaining 5" x 6" piece of fabric with the 2 folded "pockets" lining up at each end.

6. Then lay the outside piece (with interfacing attached) on top. The top piece of fabric should be right side facing down and interfacing should be facing up.
7. Sew around the card holder using 1/2" seam allowance and leaving a small opening to pull the fabric through. I left my opening on the side because there are less layers there.

8. Once you are done sewing, be sure to clip the corners outside the seam before turning it out.

9. Turn the card holder by separating the backing fabric and inside and pulling through.
10. Once it is pulled through, use a stiletto or other tool to poke out the corners and make them square.

11. Iron flat and then topstitch about 1/8" from the edge all the way around the card holder.

12. Now just fold in half and give a good press (using starch will help it keep shape)...add your business cards and you are done! The finished size when closed is 5" x 2" and when open 5" x 4".
This really is simple and quick (I put this together in about 1 hour while I was stopping to take photos for the tutorial). If you decide to make one, I'd love to see what fabric you choose.
Thanks for stopping by!
Amanda